Thought I'd kick things off this evening by connecting up the Y-axis motor and writing a short sketch to drive the stepper back and forth a few times - simple right? Wrong.
Connecting the stepper was easy enough, writing the sketch was easy enough - but would the motor move - oh, no... not a chance. So, having traced pin assignments, double-checked code, read through the Sprinter firmware, several tutorials on adruino/stepper combos, fiddling with Pololu driver current and finally rebuilding the connector for the motor, I finally found the issue.
*drum roll*
The Pololu enable pins are inverted - low to enable, not high! In my haste to write that little sketch, I missed that little fact and have summarily wasted the rest of the evening - smeg. On the up side, I found this little tutorial on assembling servo connectors:
http://www.rchelisite.com/how_to_crimp_servo_plugs.php
Which helped a great deal, as it turns out my first attempt was a criminal bodge compared to how it should be done - I'm sure I used to know how to do this stuff, but apparently it's been too long.
Having got the enable pin the right way round, everything works perfectly. I even took a few minutes to make the sketch accelerate the motor at the beginning/end of each move just for kicks... makes the motor sing a little tune as it moves :)
Now I'm knackered, so must sleep and will have to wait another day to get the rest of axes wired :(
PS - will youtube a video tomorrow and post the sketch in case anyone else might find it useful
Sunday, 24 July 2011
Saturday, 23 July 2011
It's Alive...
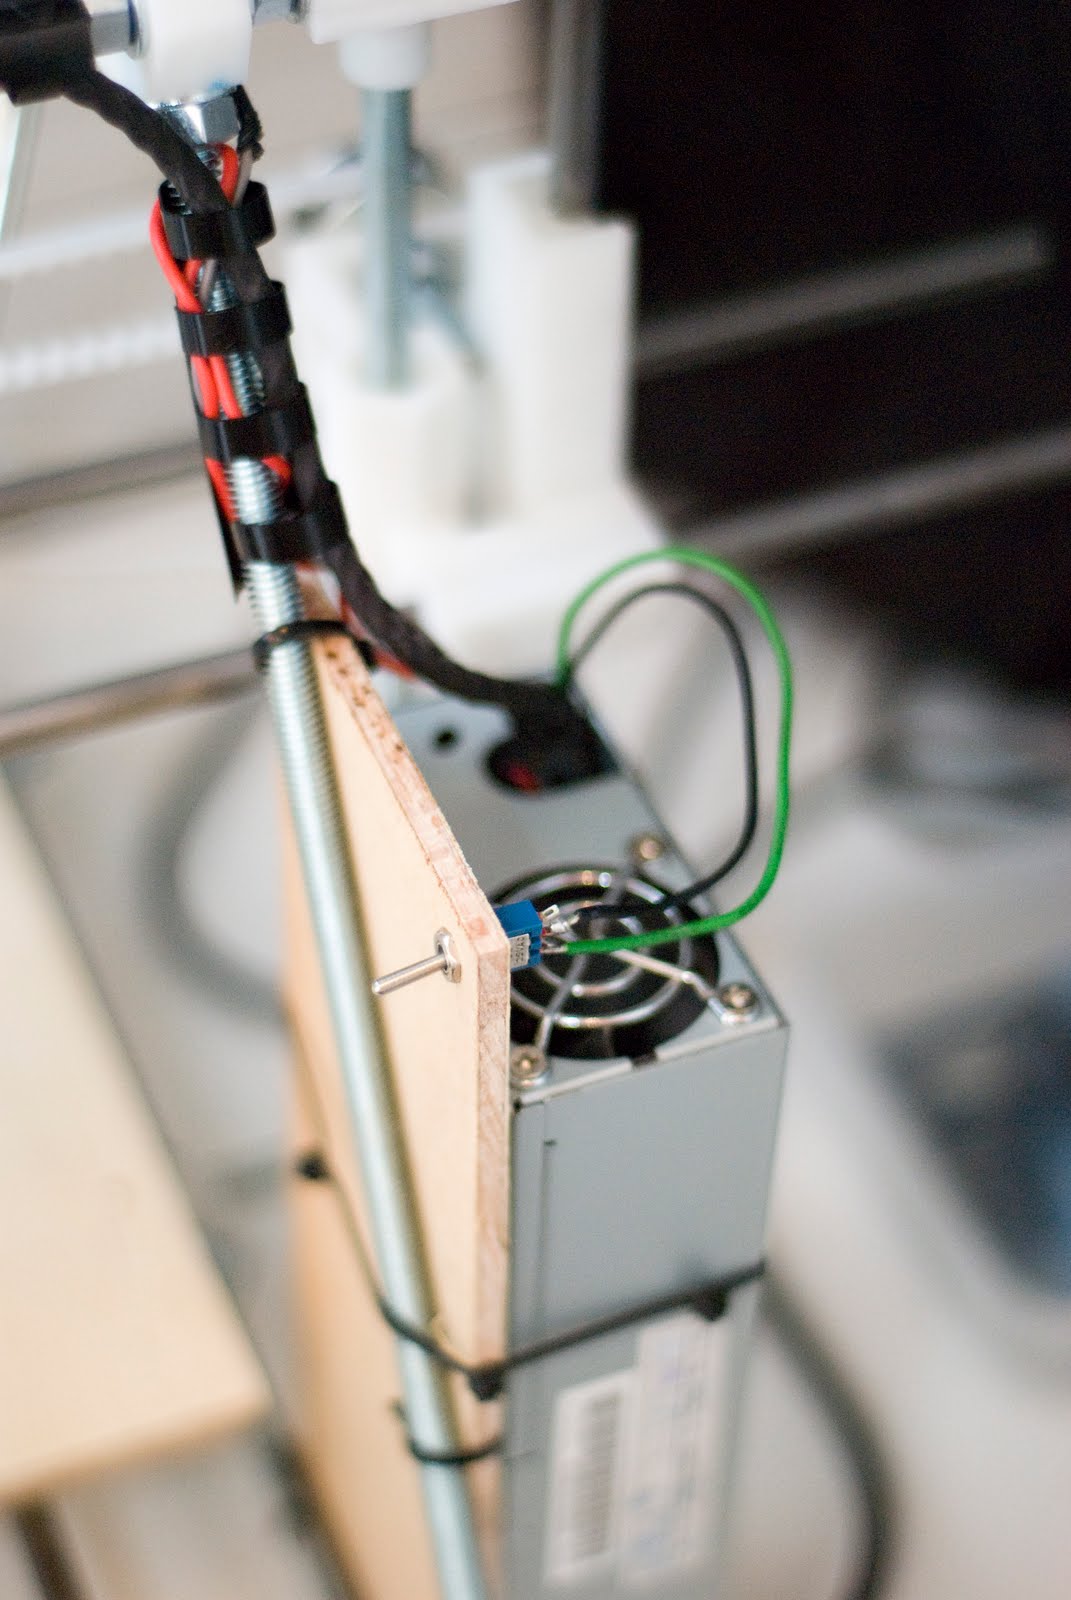
A few hours this evening, and the odd burst over the last two weeks mean the axRap now has a brain and beating heart.
It began on dark, mild night when the organs of an old ShuttleX SSG were removed...

Dragged back to the lab under cover of darkness, the heart of the shuttle was stripped down to the bare essentials...


All surplus connections were removed, the auto-sense connection soldered onto the bleeding stump where the 3.3V wires used to be. Power-ok (gray) and a 5v line were kept for a possible future application. Power-on (green) and a ground were connected to an old toggle switch then everything was sewn back together by hand...

Then it was time for the saw, at it's mercy was some left-over 6mm plywood from the bottom plates. A few quick strokes, a flurry of the bone drill and a makeshift cradle for the heart was ready...

With the Shuttle's blood barely dry on my hands, I turned my attentions to the brain. A further application of saw, drill and heavy duty threads produced the base of a cranium - with cooling fan. Arteries were laid in, held in protective spiral bindings, and with a flick of the switch I bestowed animation upon this lifeless matter. Admittedly, the animation was merely the drone of a cooling fan, but still - it's progress.


Given it's 1am, I need to get some sleep - so connecting the first of the stepper motors will have to wait until tomorrow. Before I sleep again, I'm hoping to have at least one axis moving under Sprinter firmware, including an endstop.
It began on dark, mild night when the organs of an old ShuttleX SSG were removed...

Dragged back to the lab under cover of darkness, the heart of the shuttle was stripped down to the bare essentials...


All surplus connections were removed, the auto-sense connection soldered onto the bleeding stump where the 3.3V wires used to be. Power-ok (gray) and a 5v line were kept for a possible future application. Power-on (green) and a ground were connected to an old toggle switch then everything was sewn back together by hand...

Then it was time for the saw, at it's mercy was some left-over 6mm plywood from the bottom plates. A few quick strokes, a flurry of the bone drill and a makeshift cradle for the heart was ready...
With the Shuttle's blood barely dry on my hands, I turned my attentions to the brain. A further application of saw, drill and heavy duty threads produced the base of a cranium - with cooling fan. Arteries were laid in, held in protective spiral bindings, and with a flick of the switch I bestowed animation upon this lifeless matter. Admittedly, the animation was merely the drone of a cooling fan, but still - it's progress.


Given it's 1am, I need to get some sleep - so connecting the first of the stepper motors will have to wait until tomorrow. Before I sleep again, I'm hoping to have at least one axis moving under Sprinter firmware, including an endstop.
Wednesday, 20 July 2011
Ethernet enabled Arduino as RepRap host
Admittedly this is a little premature, but I'm keen to detach my printer from the host computer as soon as possible. Wired Ethernet is my preferred option - it can be accessed from all of my devices (desktops, laptops, iPad, iPhone, etc), is fast, reliable and fairly cheap compared with wireless options.
Reading this tutorial Arduino Ethernet + SD makes it sound doable and there's a chance I can borrow an Ethernet shield to have a play.
I envisage an Aduino/Ethernet combo acting as the host and talking serial to the printer's Arduino Mega/RAMPS controller. The host would support uploading a G-code file to the SD card, queuing prints, control power to the printer (toggle ATX power) and also act as a watchdog by monitoring printer enclosure temperature/dead comms link. Cost of the Ethernet module would be somewhat offset by avoiding the need for a display/controls on the host/printer as these can be provided via the web interface and accessed from a existing device.
It might also be practical for the host to operate multiple printers - something I'm keen to try.
Tuesday, 19 July 2011
Gen7 Enstops
Ordered these a while back, but today they arrived... 6x Gen7 EndStops, courtesy of Traumflug

Will try and find some time to assemble them later this week. I did manage to find a few minutes this evening to rig up an ATX supply to the RAMPS board and test everything powered on ok - looking good so far. Can't wait to get the motors connected and test the axes!
Will try and find some time to assemble them later this week. I did manage to find a few minutes this evening to rig up an ATX supply to the RAMPS board and test everything powered on ok - looking good so far. Can't wait to get the motors connected and test the axes!
Heated Bed
Having explored various options (alu tooling plate with resistors, silicon heating mat) I've taken the easy way out and ordered a PCB Heatbed Mk1 (by Prusa) from reprapsource:

http://reprapsource.com/en/show/6403
Original post on thingiverse: http://www.thingiverse.com/thing:3919
Pity about the shipping charge, but seemed to be simplest option overall and good value compared to the alternatives (~£42 inc shipping).
I also finished the RAMPS electronics last week - will get round to posting a picture soon. Next up is ordering a J Head Hotend and some parts for the Wade's Extruder from thingfarm.org.
Saturday, 9 July 2011
RAMPS Assembly
Started assembling the RAMPS v1.2 board - just over an hour and I've progressed as far as I can without the Arduino Mega board. Will finish up next week...


Friday, 8 July 2011
Loctite, Castrol, spacers, nut-Y-less, RAMPS and a Mega issue
Managed to squeeze in a little progress this week...
Loctite
Some of the nuts on the frame were already working loose (as of last weekend), so after skimming the forums for suggestions - I ordered 10ml of Loctite 243 ThreadLocker. As of yesterday, I've now put a dab of loctite under each nut on each vertex, plus those around the Z-motor mounts. This also gave me the chance to fine tune the distances between each vertex.

Lithium Grease
The smooth rods were fairly grubby and there was far more friction on the X/Y axes than I'd like. So.... a few minutes of judicious scrubbing with some wet wipes cleaned the rods, followed by a light application of lithium grease (Castrol LM Grease) has made a big improvement.

Spacers
After my initial assembly, the Y-axis belt met the bottom plate at quite an angle - especially when at a min/max extreme. After a bit of research, this seems to be because the design is intended for a 10mm thick bottom plate - whereas mine is only 6mm. The solution was a couple of ply offcuts to raise the height of the belt mounting point.

Nut-Y-less
The standard Prusa places a nut between the Y motor bracket and the belt pulley - this seems unnecessary and causes additional strain/flex on both the motor shaft and the Y motor bracket. Removing this nut didn't take long and has not only reduced the moment on the motor/bracket, but has also given enough clearance to properly centre the Y-belt against the bottom plate.

RAMPS in the house
The RAMPS kit I ordered from xyz printers arrived yesterday - will get started on soldering that this evening...

A Mega issue
The arrival of the RAMPS kit prompted me to check that it would fit properly on the Seeeduino Mega, only to realise that I've been a complete idiot and somehow missed the fact that the Seeeduino Mega is not pin compatible with the Arduino Mega! and therefore not compatible with the RAMPS shield! :(

I did consider creating a frankenstein mating of Seeeduino and RAMPS, but then thought better of it and ordered an Arduino Mega 2560 off eBay for ~£24. It dispatched this morning, so hopefully will be here on Monday.
I'll keep hold of the Seeeduino Mega for now, as I have an upcoming project planned that will make use of the hardware...
Tuesday, 5 July 2011
RAMPS
Having started out with the intention of building Pololu-style electronics on strip-board, Maplin let me down on stock, Farnell have an annoyingly high minimum order quantity and I lost patience with assembling shopping carts of PCB connectors to try RS. Net result, I ordered a RAMPS kit from xyz Printers: http://xyzprinters.com/electronics/107-ramps-complete-kit.html :)

Friday, 1 July 2011
Frame complete
Two more evenings and the frame is complete... with the exception of the print plate (forgot to swipe some springs)

Day 2 timelapse
Day 3 timelapse
Next up - electronics! :)

Day 2 timelapse
Day 3 timelapse
Next up - electronics! :)
Subscribe to:
Posts (Atom)